Category Archives: Papercraft

It’s Christmas Card Season!

Last year I did a lot for Christmas. We threw a party and there were place cards and everything. This year I anticipate being fairly busy, and I doubt I’ll have time to do nearly as much, but I did have the evening free and I figured, first of December, I’m definitely meant to get my Christmas Cards for the year put together. And look, I even had the inspiration already.

IMG_4557

They’re fairly simple this year. All I needed was the blank cards themselves, thread in three colors (green, lighter green, and red) and a needle which could handle three threads through the eye.

IMG_4547

I grabbed my handy triangle and drew dots where I wanted there to be stitches, so that my stitches would be even.

IMG_4553

Then I anchored my thread with a knot, stitched back and anchored, stitched forth and anchored, stitched back and anchored, ect.

IMG_4564

Once I had a fully formed tree, the card was finished. Super cute!

IMG_4559

TARDIS Cross Stitch

This is a little late, but I wanted to share this great cross stitch bookmark that I made for a good friend’s birthday.

IMG_3255

I found this project here, (on Pinterest, of course).

IMG_3238

I love how the TARDIS appears and disappears.

IMG_3233

In fact I think each individual TARDIS is super cute itself.

IMG_3245

Bonus! I bet you didn’t notice, but I was able to photograph (and gift) it with the River Song Diary I made a few years ago. It was a super fun gift to make and give!

A Ship!

Today, I’m sharing another project from the children’s show I’m working on (yes, the same show as the compass). This is something I’m really quite proud of, as it took me much longer than strictly necessary.

IMG_3205

One thing you should know about this show before I start telling you about my ship, is that it’s a show about travel, and especially a show about boats. It also included many, many simpler boats, many of which I also made out of cardboard.

2015-04-06 18.47.01

My ship is made of an old shirt, cardboard, ka-bob skewers, and some paint (and bits and bobs I had stashed away)

IMG_3194

I glued together some skewers for the masts and painted them.

IMG_3193

Then I created the sides of the boat from a few layers of cardboard and hot glue (I used over 3 packages of hot glue for the show!)

IMG_3195

I built a few decks, and started to lay in some shading,

IMG_3196

and then continued the wood-grain painting for the rest of the ship.

IMG_3227

Finally, I added some sails!

IMG_3228

and some “rope”, chain, and other “nautical accessories”.

2015-04-06 20.49.14

This picture better represents the color of the paint, and you can see some of the “nautical accessories”. All in all it took me almost 15 hours (probably, I wasn’t counting) to build this really fun piece, which is headed for an elementary school classroom after the show ends. In total I spent about 1$ on the old shirt, and 3$ on the ka-bob skewers (which I’d actually purchased for the pile of boats shown above, so it kind of doesn’t count). The paint and “nautical accessories” I already had.

And a bonus picture of the compass under light! It looks so good!

2015-04-06 19.07.30

Lots of Cardboard

Hi! Just a quick note- I’ve been in the middle of tech this week and next week, but I wanted to share something I made with lots of cardboard and some paper and paint for a children’s show I’m working on.

IMG_3109

It’s a compass! It’s large! You can move the dial by hand!

This show is seriously adorable though, and I can’t wait to share more of my projects from it with you next week. 🙂

How to Make: Scrap Paper Last-minute Holiday Cards

It’s the day before Christmas and like probably everyone else, there’s some little piece of my Christmas puzzle missing. In my case, it’s holiday cards. I haven’t sent any yet, and I know I was supposed to do that.

IMG_2668

For you it might be gift tags on your last minute gifts, or name cards for your table, or even thank you cards to be sent hopefully within a month of Christmas as soon as possible (this one also applies to me whoops).

This quick and easy scrap paper holiday tree design is simple and fun and takes very little time, so you can get on with the rest of your little holiday details, so I’m going to share with you my process.

IMG_2656

You will need scrap paper in various patterns (Christmas-y colors are great but really any colors will do) as well as cardstock for the base of your cards (or name tags or gift tags or whatever)

First you’ll want to make your bases- I just fold one piece of cardstock in half and in half the other way, cutting to make each card half of the whole piece. This is one easy way to do it, but you can alter your card size as need-be.

IMG_2659

Cut graded triangles (meaning each one slightly larger than the last) from your scrap paper and arrange them so you like the color progression.

IMG_2665


Don’t forget to add a small rectangle of scrap paper at the bottom of the tree for the trunk.

IMG_2670


Glue the triangles so that they over-lap and add the trunk, and voila! A classy, simple holiday design for any paper details in your life. I use rubber cement for projects like this because I can rub away any outlying glue without damage to the card, but it still stays put. Elmer’s would also work well.

Happy Holidays and Merry Christmas!

Holiday Place Cards: A How-To

Today, as a lead into the holidays, I’m sharing a tutorial for these adorable place cards/name tags for the holiday party I’m throwing this weekend.

They’re so adorable and guess what I made them out of?

IMG_2574

That’s right! Paint Chips! You’ll also need some cream cardstock, some patterned paper (mine’s the striped red and white tissue paper), and I used some lovely pearl stickers as accents. These are optional. Also important are the wonderful Elmer’s tacky glue, and a hole punch (mine happens to be heart shaped because…reasons.)

IMG_2586IMG_2587

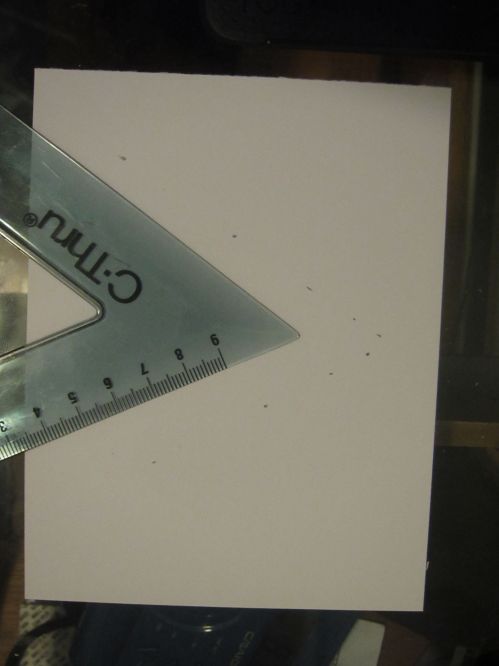
First, cut an almost-square from the cream cardstock. Mine was 3.5″ x 4″ approximately.

IMG_2570

Fold it in half like a hot dog.

IMG_2571

At this point I like to score the fold, and then weigh it down under something kinda heavy, like my button jar or a glass of water.

IMG_2575

Below you see some of the basic makeup of the cards- specifically the piece where the writing goes later.

IMG_2576

You’ll want to layer a small section of the patterned paper, and a section of the cream (or if you want to be extra fancy, get your hands on some white card stock and use that) on top in a place that looks good, leaving some room to the side for your wreath or tree.

IMG_2583

A thin layer of tacky glue works for this, though I did use rubber cement for this part of it, because I had some extra. For the little pieces, though you’ll want to use tacky glue for extra security.

These are close ups of the parts you’ll need for the wreath and the tree, respectively. You’ll want a bunch of green heart shapes for the wreathes, as well as two red ones for the bow and the pearl accent. For the trees, you’ll want four triangles in ascending order, a piece for the trunk, and the pearl accents.

IMG_2582IMG_2581

This is an image of my setup, I tried to vary the colors I used in both the trees and the wreathes in order to keep it interesting.

IMG_2585

Glue the pieces together in the shape of the accent you want to make- starting with the trunk and layering the pieces for the tree and layering the hearts over each other for the wreath.

IMG_25771IMG_25791

Make sure you use tacky glue to reinforce the pearls, I never trust adhesives from the product!

Enjoy making them! Once you have an army of them you’ll be ready to throw a party and label the cookies with “gluten free” or the dip as “containing nuts”!

IMG_2588

Apple Pie

It seems like the desserts never end! First cake, then zabaglione, and now apple pie! Regardless, I’m super happy with how this one turned out.

IMG_5785

I started with a cardboard base.

IMG_5768

I was struggling with how to make the crust look appropriately “rolled” and “pinched” the way that pie crust does, when it hit me that I could cut slats and bend them. So I did!

IMG_5773

The top of it looked far too plain so I added some faux lattice work by making cuts and strategically scoring the top in several places.

IMG_5776

Then I created a filling with cling wrap and paper.


IMG_5783


Finally, I added the paint and the ice cream to give it a little bit of “realism.”

IMG_5785

It actually looks really really good, especially compared to the reference photo I used.

images (4)

Rolls and Butter

Where would a several course meal be without a nice basket of rolls and butter on the table?

IMG_5797

This was my reference image for the rolls. I’m still considering the coloring, but haven’t come up with an option I like yet.

rolls reference

Basically, the way I did this is I cut four rectangles of sweater, sewed them into tubes, inverted the tubes, and stuffed them with scraps from the sweater (waste not, want not, or “I’m too cheap to use polyfill”)

IMG_5793

Then I braided them into little rolls, which remind me more of houska, a specific kind of roll made in the Czech Republic than the research image. Whoops.

IMG_5788

I tried to add french knots as “poppy seeds” but they looked more like the rolls were diseased or something.

IMG_5732

This is my set up for the butter. I’m actually really proud of this idea, because I had no idea how this was going to work out.

I took some white lace and tea dyed it to give it that lovely tan butter color.

IMG_5708

While it was drying, I created some bases from cardboard and ivory colored paper.

IMG_5729

There was actual math involved in making them real rectangles!

IMG_5730

Then, I covered them in bits of lace to give them some texture and interest.

 IMG_5731

These are two pieces I’m honestly rather proud of.

IMG_5797 IMG_5732

Not Food

My newest project is Top Girls, by Caryl Churchill. It starts with a banquet. Three courses, six people, and each orders something different. We’re taking a fanciful, imaginative, totally not real food at all direction. Starting with cake.

IMG_5706

This one is made of paper, with cardboard reinforcement.

IMG_5698 IMG_5699

This is the initial outline for the frosting topper.

IMG_5701

All put together!


IMG_5703


It was modeled after this image, from here.

IMG_5704


How did I do?

Monster Bookmarks Tutorial

I lost the bookmark I’ve been habitually using to keep my place in my planner yesterday. I figured I would take this opportunity to do a How To for a very fun corner bookmark to keep your place in any book!

IMG_5319

I got the idea from Pinterest, of course. The source link is from ct baker, and though her version is an origami version, I prefer a variation that involves a little glue, but no visible seams.

IMG_5308

You’ll need a few colors of cardstock; red and white for the teeth and tongue, a base color (my fuscia) and a “mouth” color (my light grey/blue). Also a small bit of mod-podge and a brush for applying it.

IMG_5309

Because I was working for a specific book, I didn’t bother to measure the paper, I just sort of fit it together. I’d recommend an altitude of 3 in. (the height of the triangle from the right angle to the hypotenuse.)

IMG_5310

Take both points (the ones <45 degrees) and fold them up to meet at the right angle.

IMG_5311

Draw a line across the paper, from one fold to the other, and cut off your original right angle corner.

IMG_5312

Take the corner you’ve cut off, and glue it inside the pocket you’ve formed with your folds, so that the back becomes reinforced.

IMG_5313

So far, your bookmark will look like this.

IMG_5314

Now, cut a square of your “mouth color”, just slightly smaller than the size of your bookmark. Glue this square into the same position as the triangle, being sure not to glue the bookmark pocket shut.

IMG_5315

Now’s the fun part, the embellishments! Cut eyes and teeth out of white paper, and affix them with mod podge.

IMG_5316

Cut black pupils, a red tongue, and eyelids from your base color if you so choose. (All of this is totally optional, go crazy and design your own!)

IMG_5317

IMG_5322

All done! Isn’t he so cute!

IMG_5319